Art: Let’s Hang
Art can be anywhere and is everywhere. There’s not a hard and fast rule for where art “has to go” in your home. It’s much like the advice you receive to purchase the art you love. You should place art where it makes you happy.
Let’s normalize displaying art wherever it feels right instead of what’s “correct.”
Don’t take it too seriously. Play around with it in your home.
If you’re having trouble making a decision on where to put the first nail in the wall, then for the pieces you plan to hang try leaning them up against the walls you’re considering. Live with it for a couple days—move them around the house until it feels right. During my recent move, I had my art floating for some time as I was settling into my new home.
Don’t confine yourself to only the tried and true spaces or the space with the best lighting. Art can be unexpected, something in a hidden corner or hallway waiting to be discovered. Surprise your guests by hanging a picture behind an opened powder room door. When they close the door a delightful image is suddenly visible!
Smaller pieces and sculpture can be styled in bookshelves, grouped with other pieces or layered on mantles or in front of mirrors.
Larger framed art can be leaned against the wall permanently or placed on an easel to make the piece a focal point.
Achieving a Gallery Feel at Home
What if you want to actually hang a piece on the wall, what is the best method**? For this we can head to the experts. Art galleries and museums. The reason why these places seem so serene is that the art is typically hung with the center line of every painting at the same height. And that height is usually at average eye level, somewhere between 57 and 60 inches above the floor.
Now imagine you have three framed photos to hang, and you want to line them up so the center line is the same for each picture.
How do you do that?
Most people just wing it and hammer in a nail and hook. If it doesn’t work they pull out the nail and try again. This can result in what I not-so-fondly refer to as “Swiss cheese wall.” How to fix that is for another day.
There’s an easier method.
Well, there is some math involved, and I know sometimes that can be hard. But I promise it’s not terribly difficult.
Get out your measuring tape and we’ll walk through the process together.
Start off by measuring the total height of the piece of art. In this case the photo I want to hang is 18”. Then divide that in half which is 9”.
Next measure the distance from the top of the frame to the hanging hardware. If it’s a wire, then pull the wire taught at the center. (If it’s a large piece that will require two hooks, then pull the wire taught at the two points where the hooks will attach and measure the distance from the top of the frame to the wire.) In the example this is 4”.
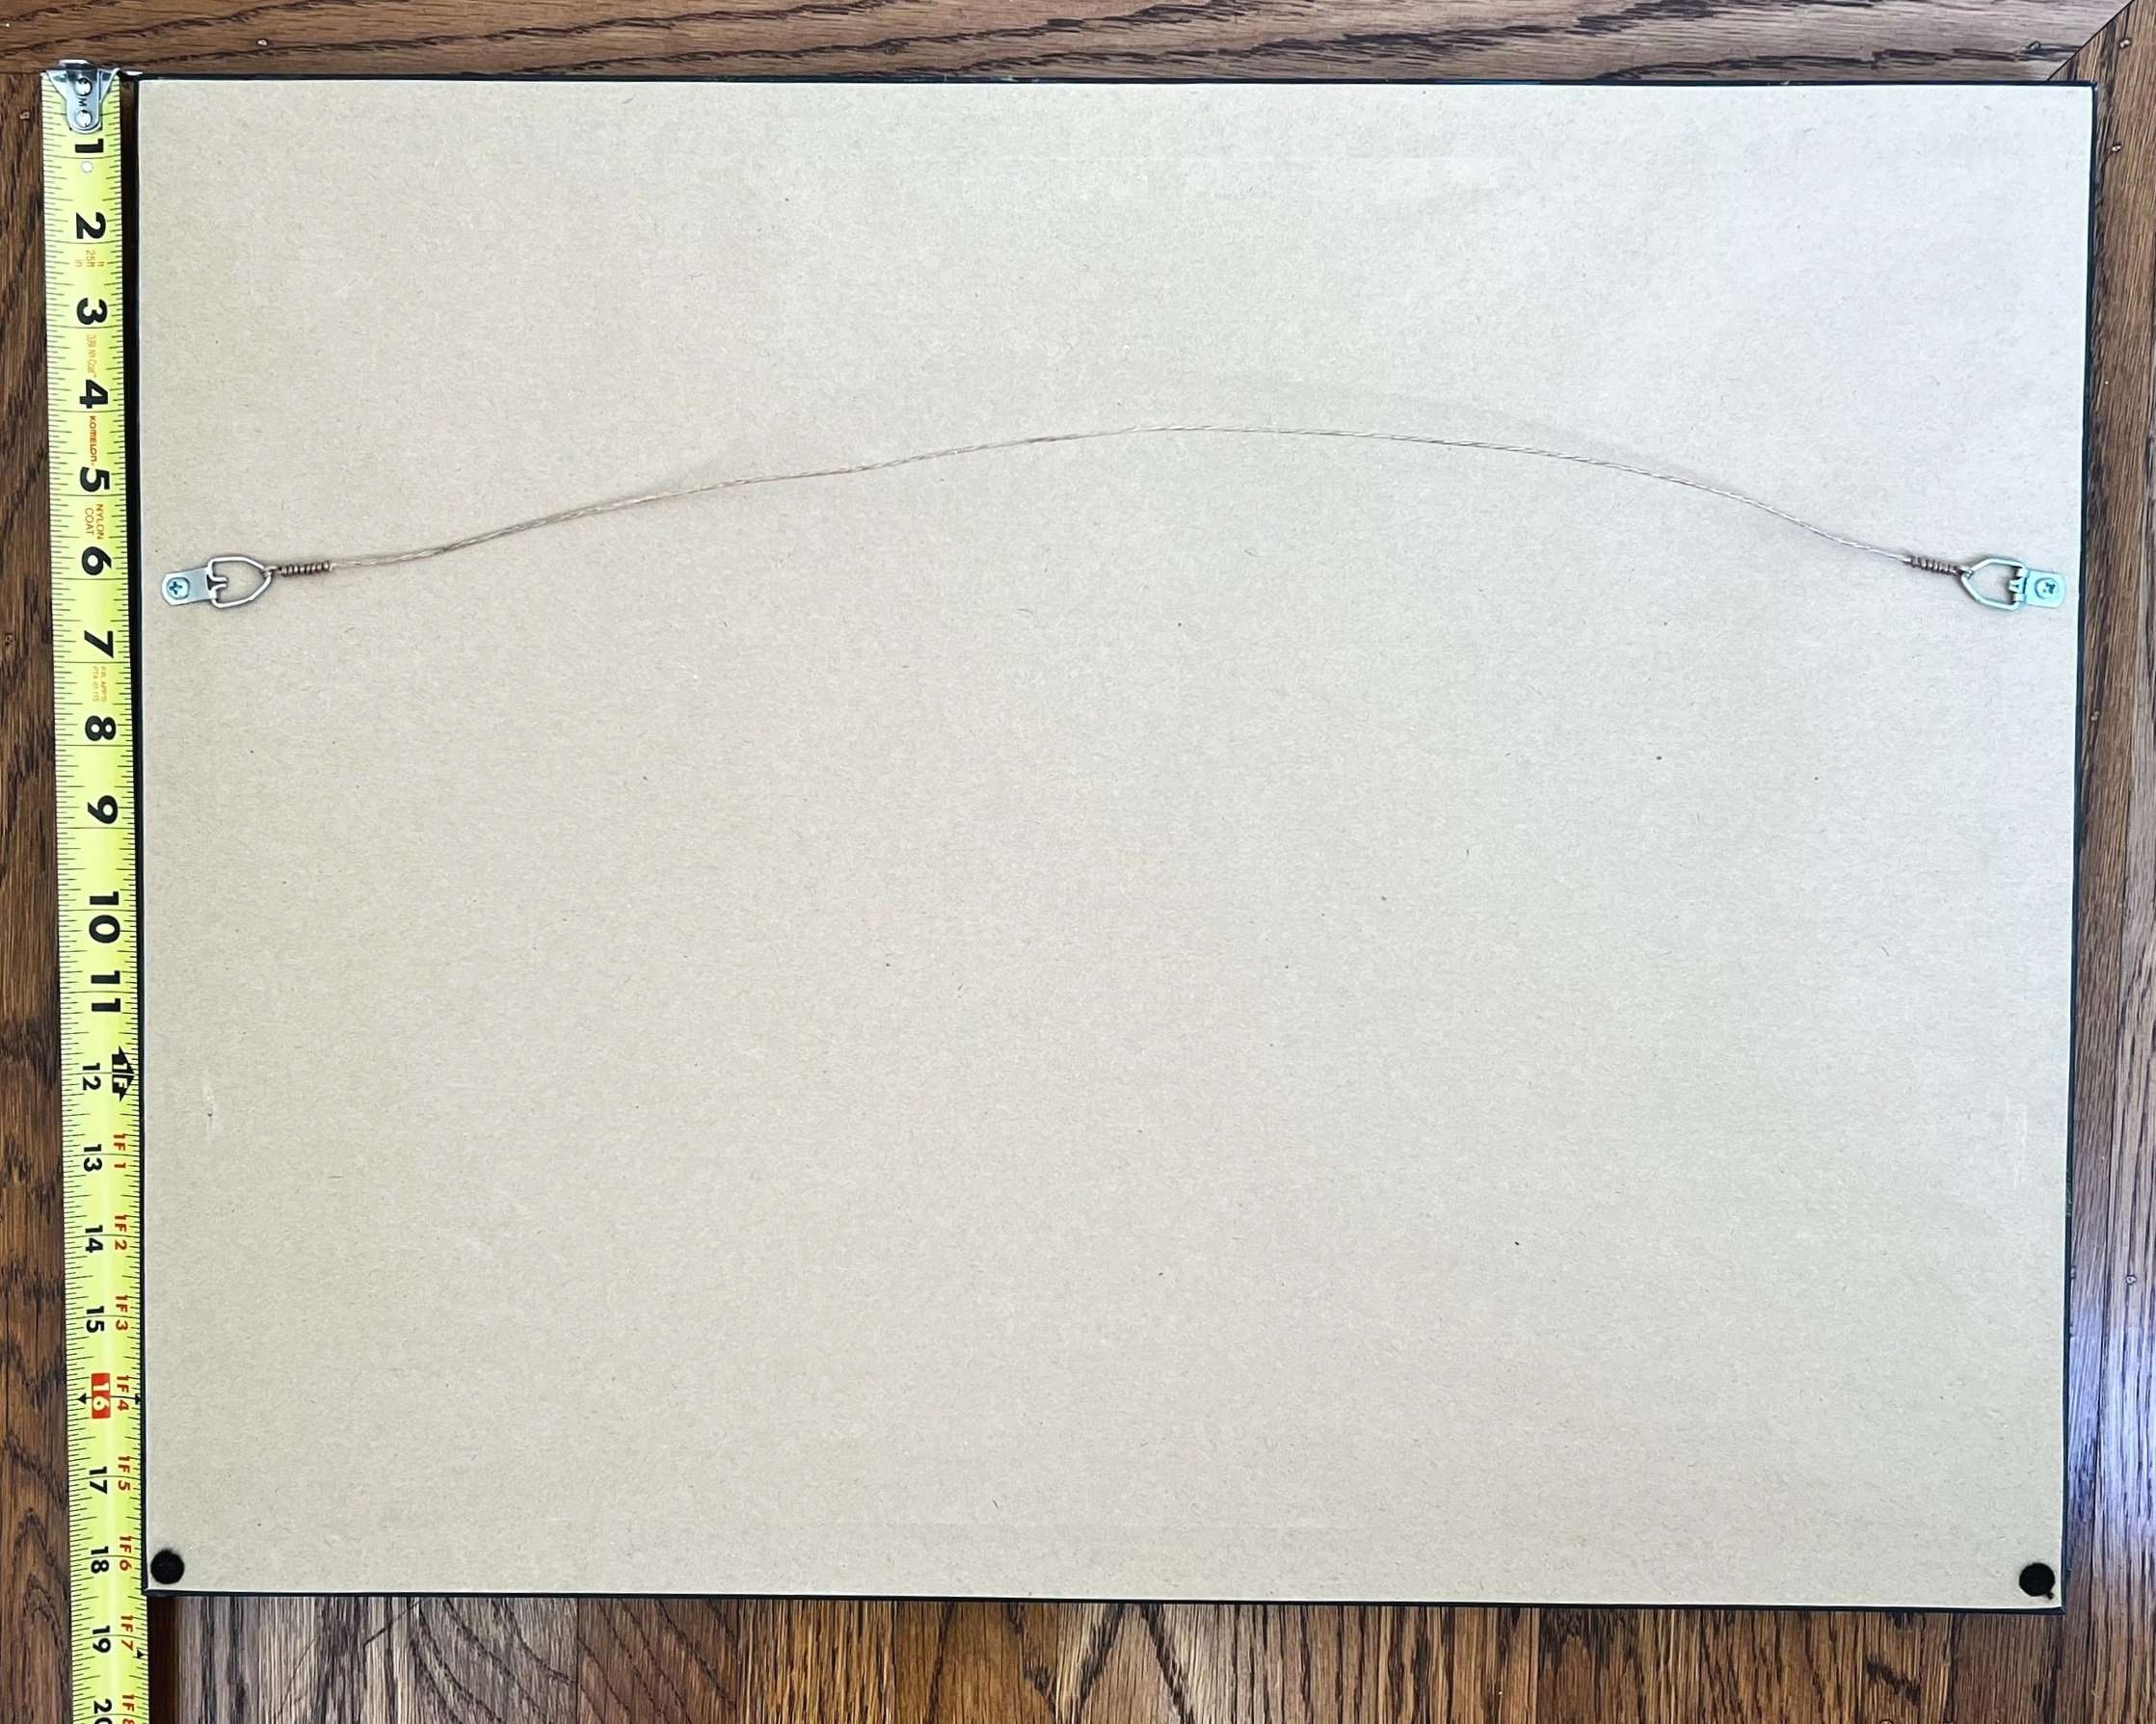
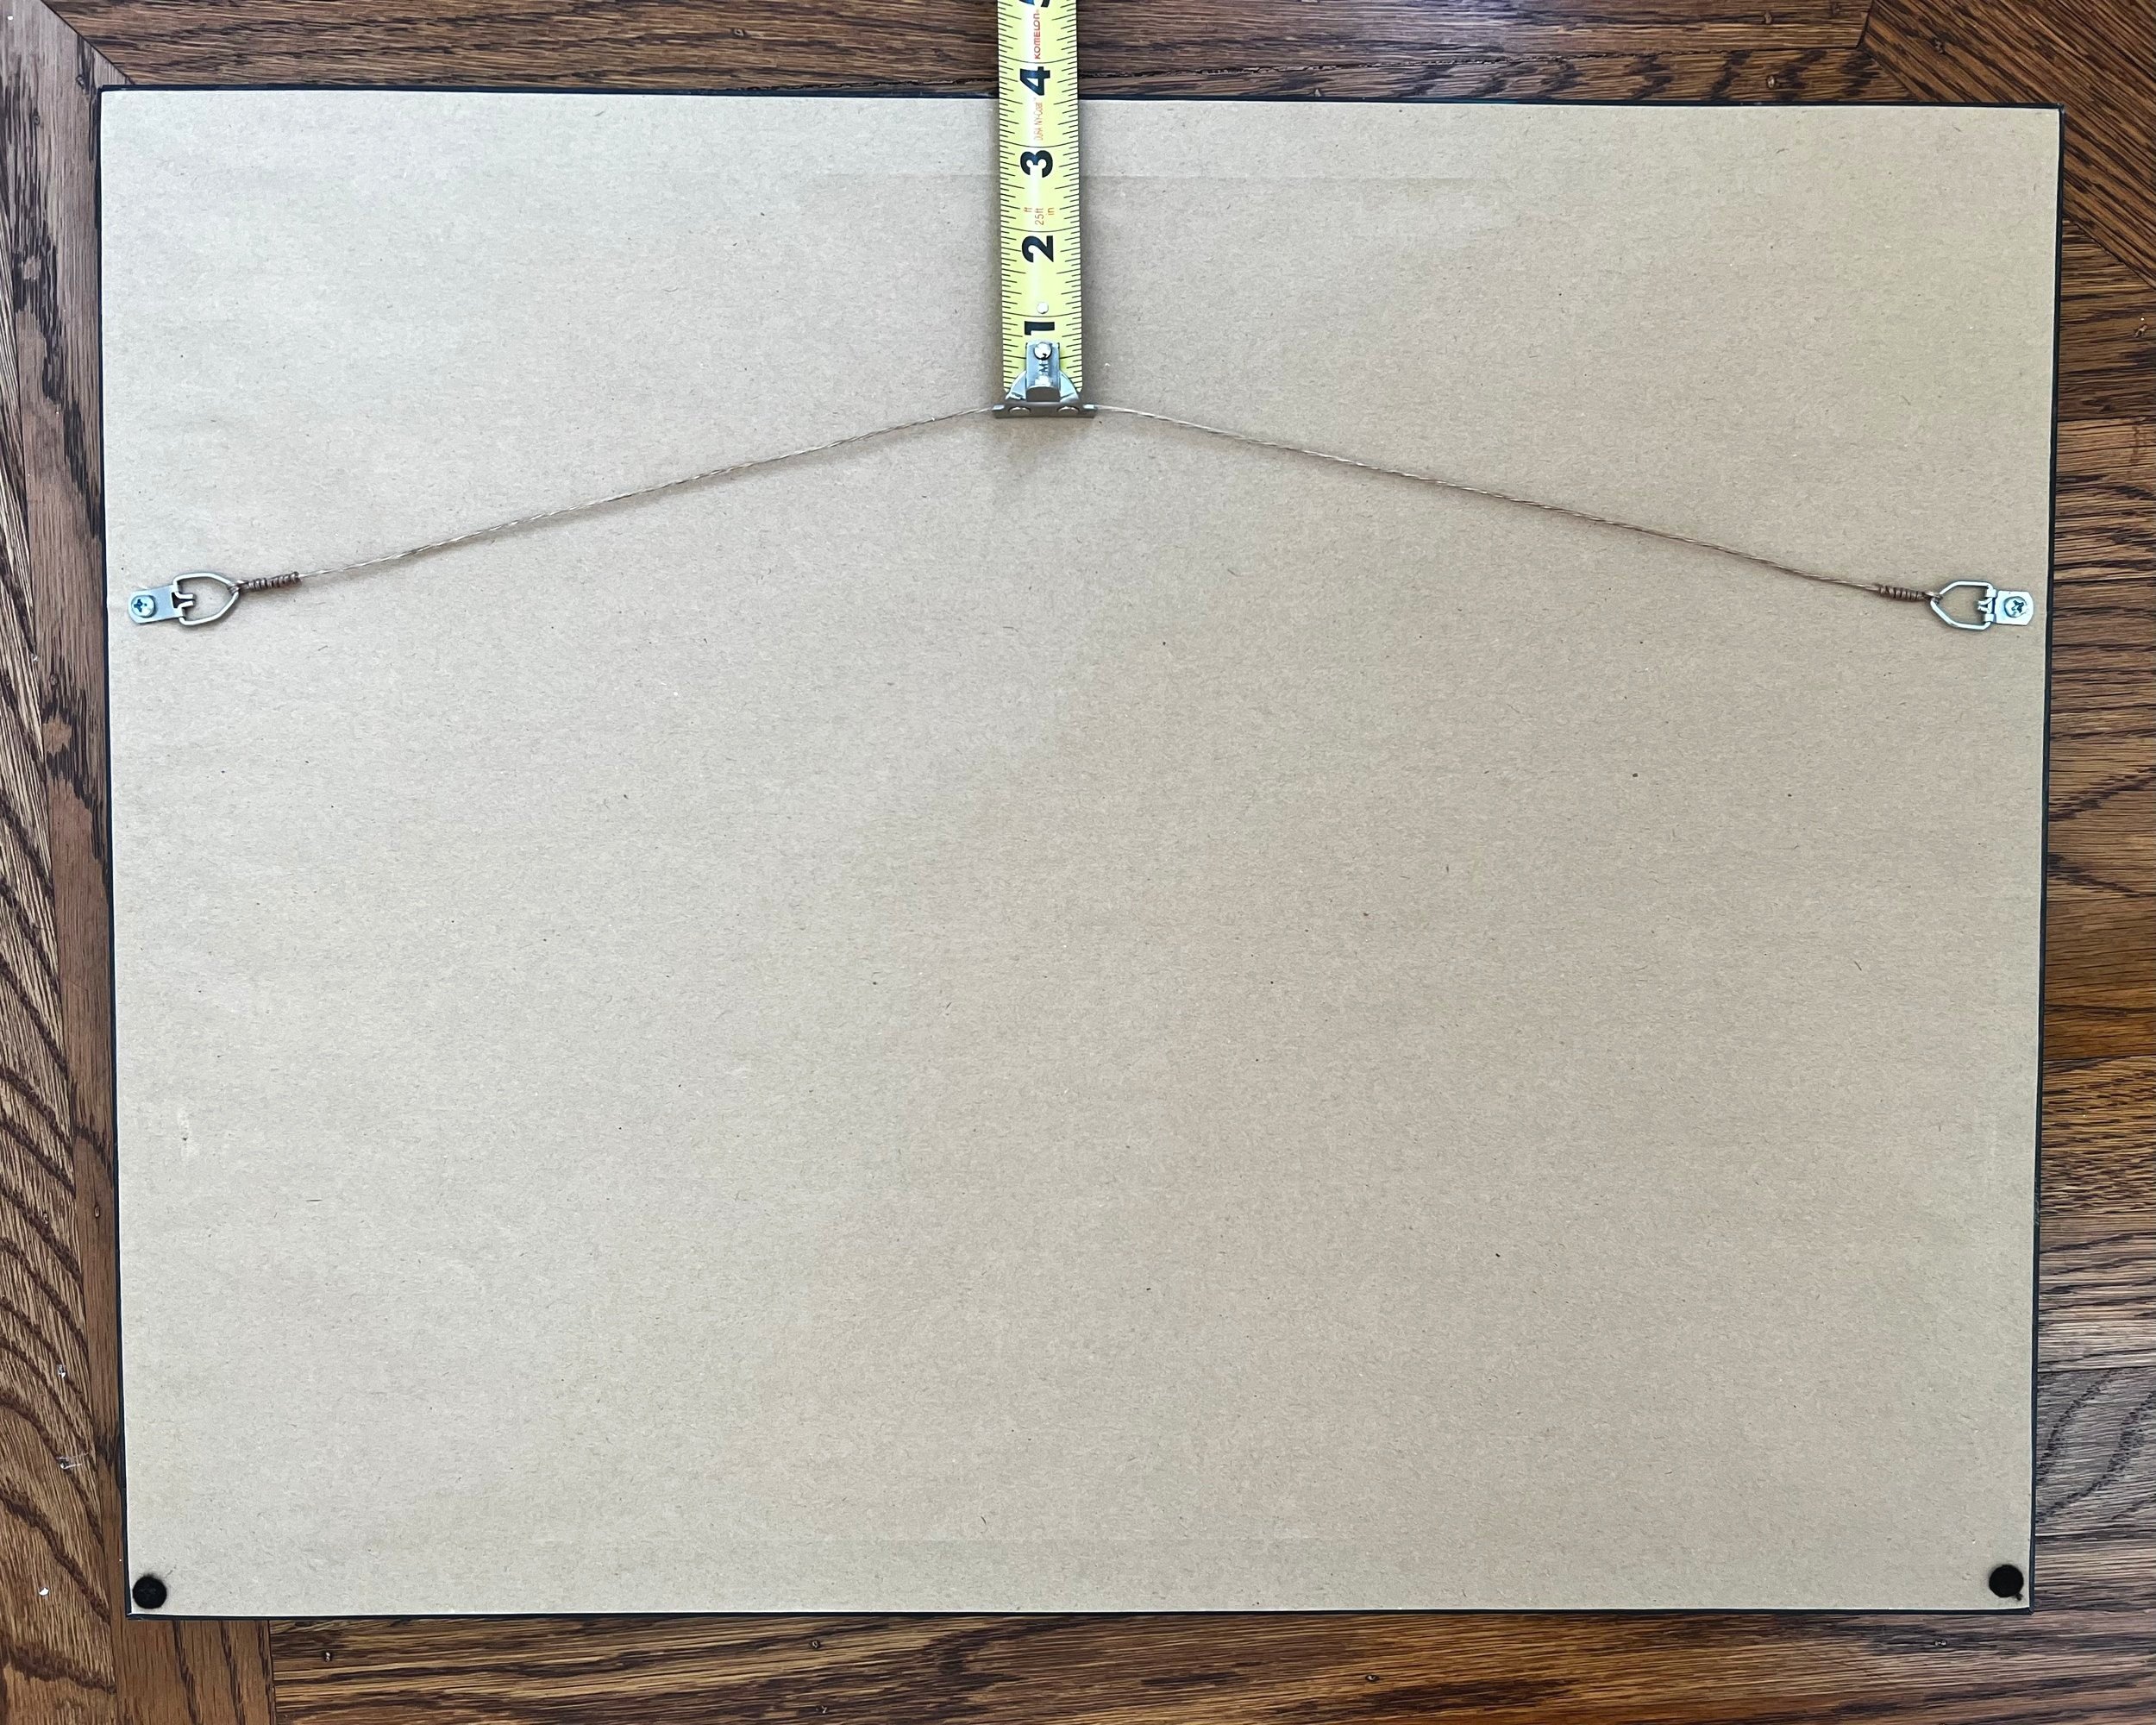
Then subtract the result from 1/2 the height of the frame—in this case 9”- 4” = 5”.
I want this photo to be at 60” above the floor, five feet which is a good eye height for many people. Add the difference in the height to the total height that is desired, 5” + 60” = 65”.
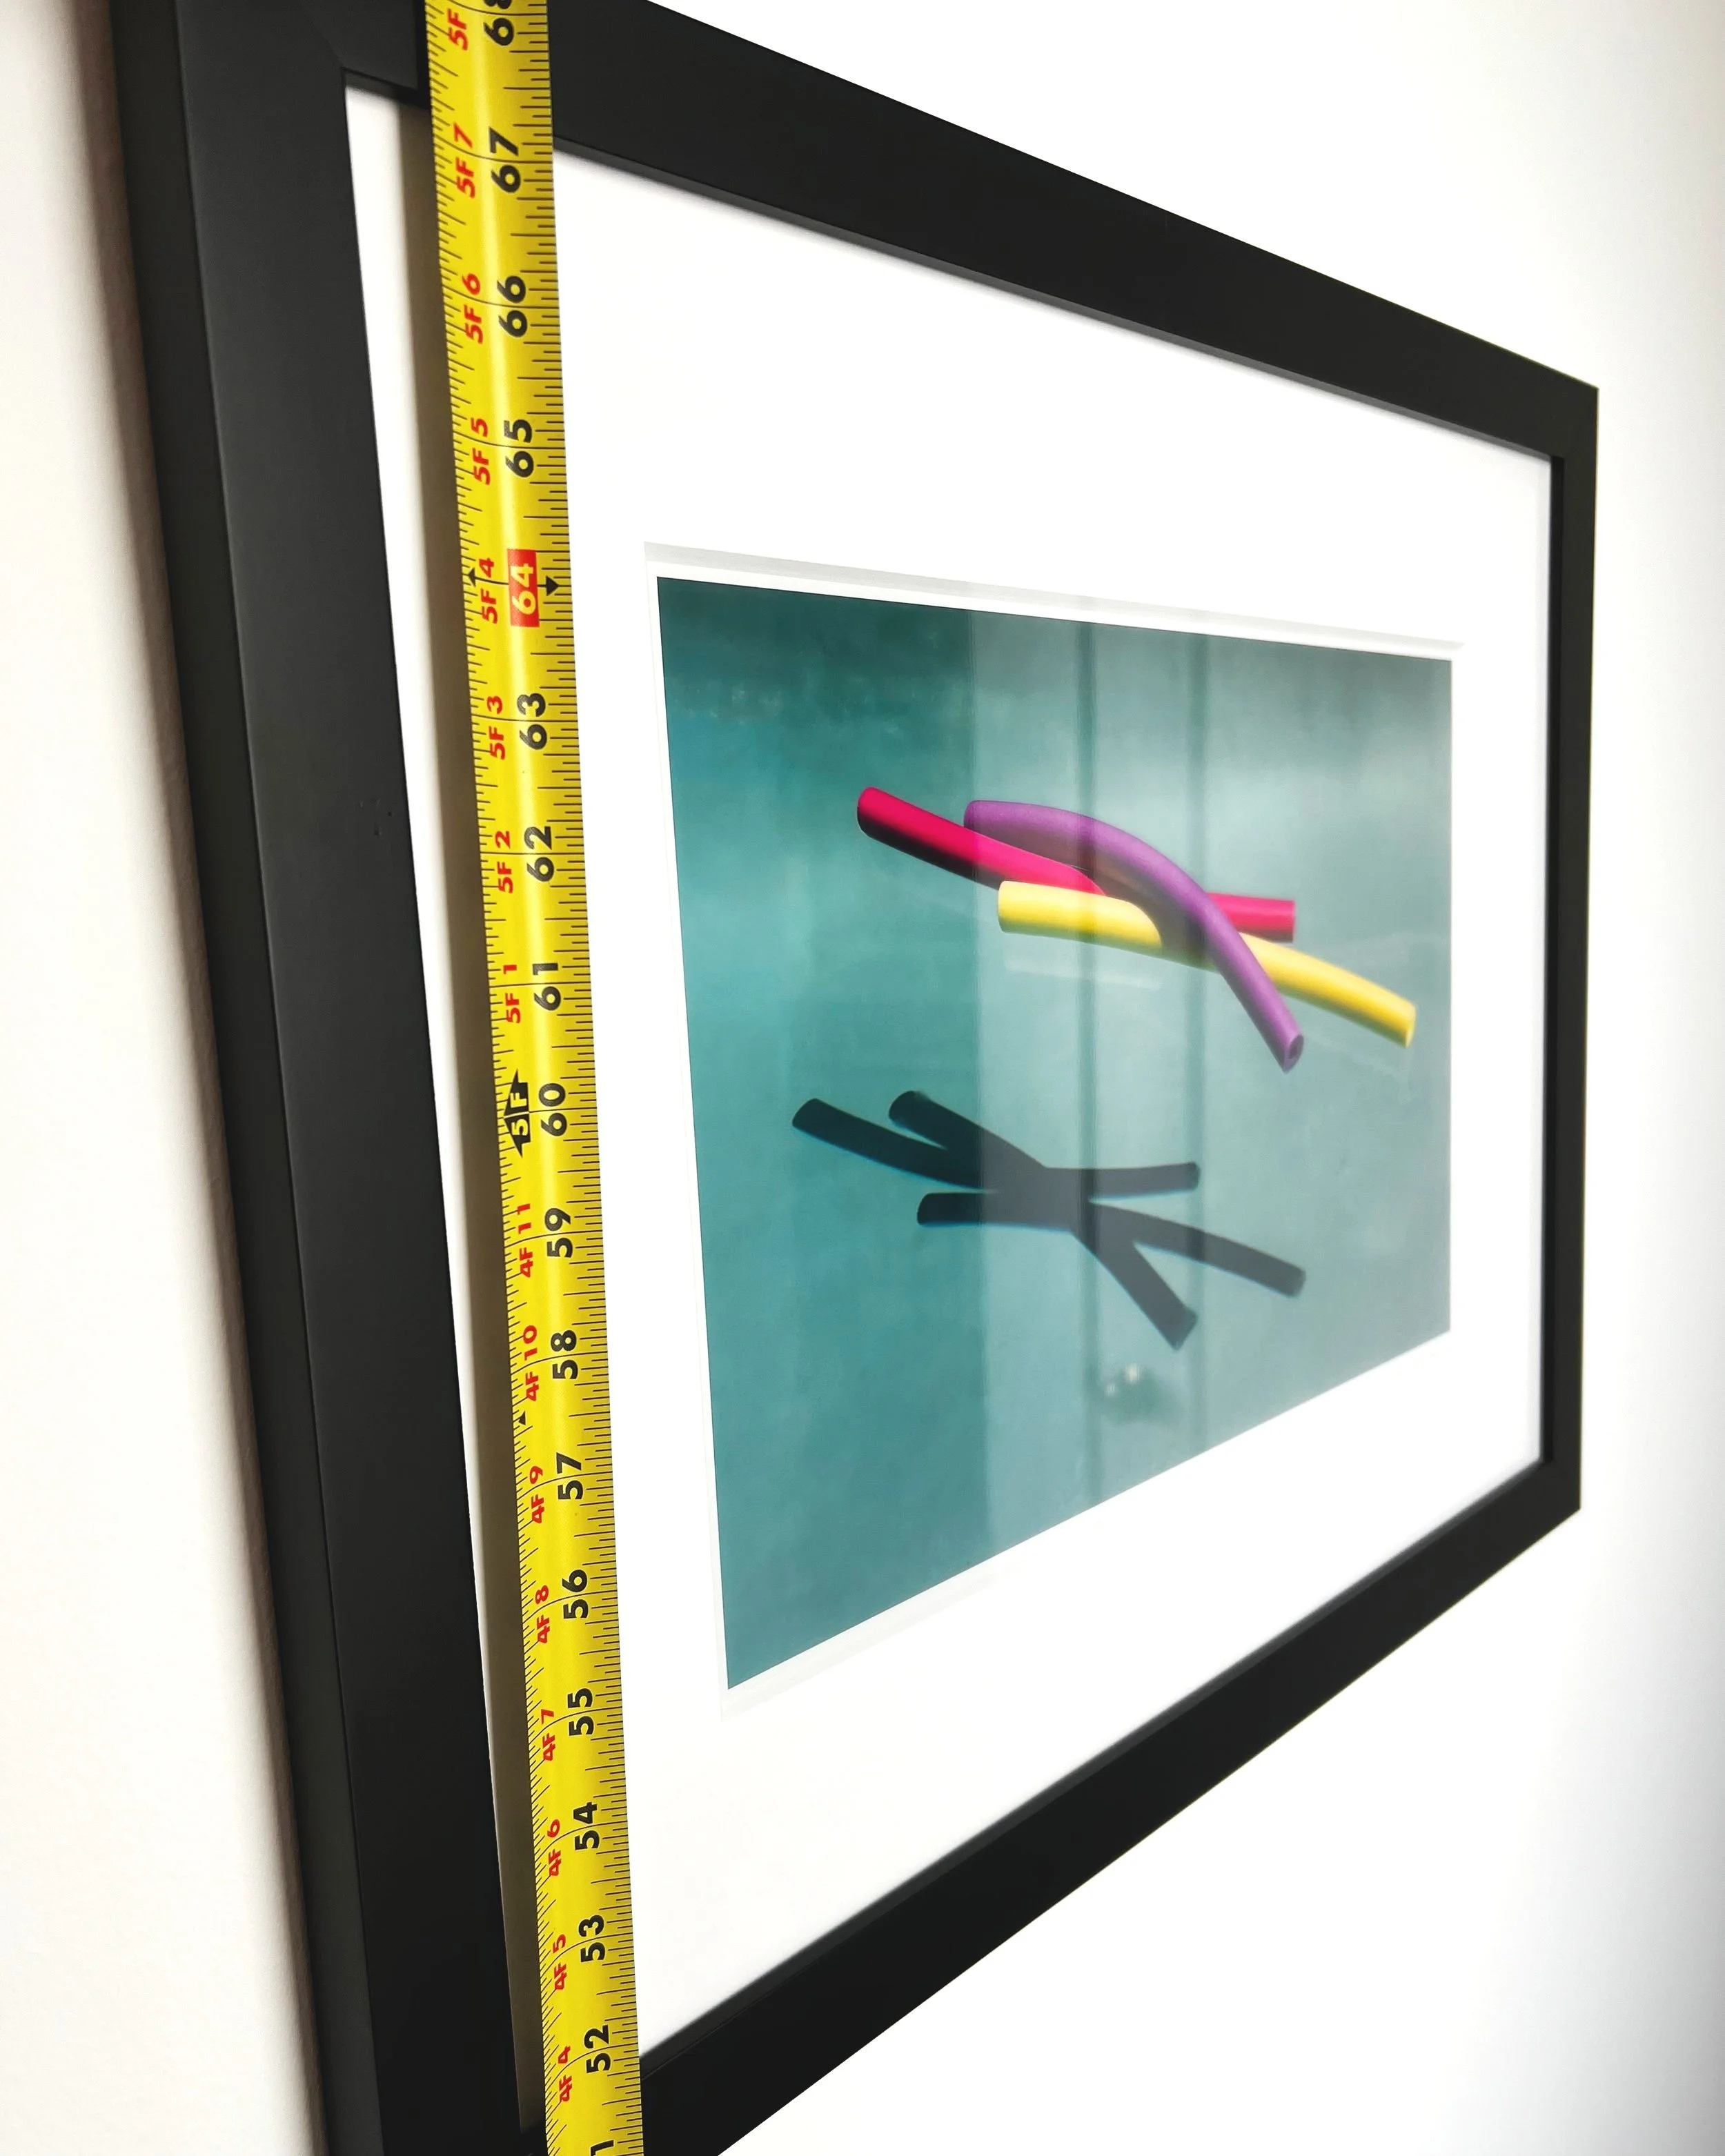
65” is the height where the nail should be hammered into the wall.
Don’t be afraid, go ahead and hammer the nail.
Hang the picture on the hook.
It’s magic. The center of the frame is at 60”.
Repeat the steps for the rest of the art you want to hang. And then sit back and enjoy the serenity of your own private gallery.
** Of course, sometimes doing it yourself is not the best method. In those cases it’s best to bring in the specialist. If you’re in the Bay Area and ask nicely, I just may share my “go-to” for such occasions. They generally follow the same rules just with mad balancing skills on top of ladders.